You just spent the entire weekend transforming a tired, old thrift store find into a stunning masterpiece. You learned how to paint wood furniture, picked the perfect shade, and applied the final coat. It looks incredible. You wait a few hours, the paint feels dry, so you slide it into place and set a decorative lamp on top.
The next morning, you decide to move the lamp just an inch to the left.
Rip.
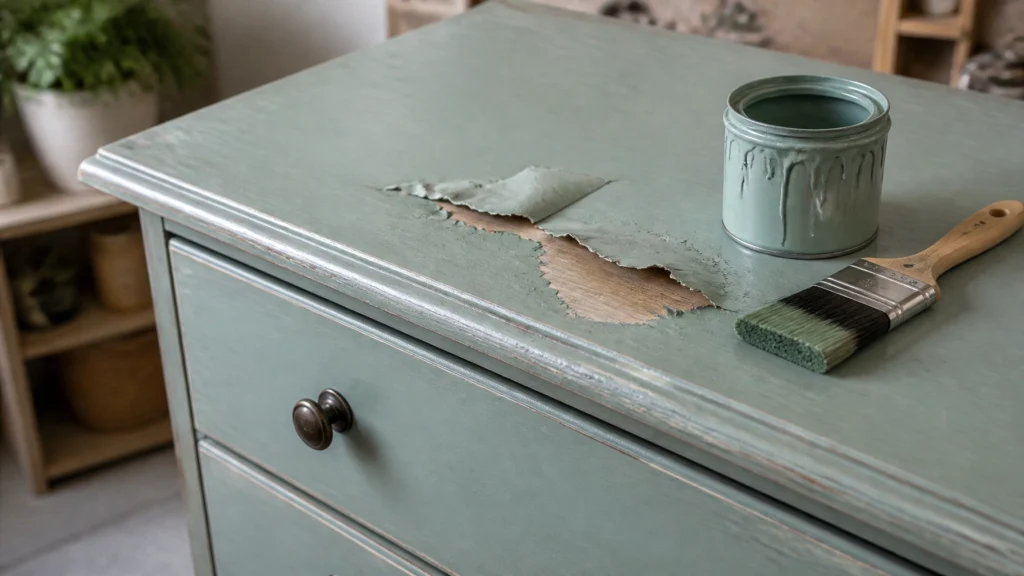
A chunk of paint peels right off the wood and stays stuck to the bottom of your lamp. Your heart sinks. What went wrong? You followed the “dry time” on the can, didn’t you?
This is the most common heartbreak in furniture flipping for beginners. The culprit isn’t usually your technique or your tools: it’s a misunderstanding of the difference between dry time and cure time.
In this guide, I’m going to break down the science of why your paint is peeling and give you the practical blueprint to ensure your next flip stays flawless for years.
Dry Time vs. Cure Time: The Simple Breakdown
To master diy furniture refinishing, you have to stop treating these two terms as the same thing. They are completely different stages of the painting process.
What is Dry Time?
Dry time refers to how long it takes for the liquid in the paint (the water or solvents) to evaporate from the surface. When a piece is “dry to the touch,” it means you can run your finger over it without getting paint on your skin.
- Duration: Usually 30 minutes to 4 hours.
- What you can do: You can often apply a second coat or move the piece carefully to a different part of the room.
- The Trap: It feels safe, but the paint film is still incredibly soft and vulnerable underneath.
What is Cure Time?
Cure time is when the magic happens. This is the chemical process where the paint molecules link together to form a hard, durable shell. It’s not just about evaporation; it’s about the paint becoming one with the surface.
- Duration: Typically 21 to 30 days.
- What you can do: Use the piece for its intended purpose without fear of damage.
- The Reality: Until this phase is complete, your paint is essentially a delicate skin waiting to be torn.

Why Rushing the Process Causes Peeling
If you’ve ever wondered why your finish feels “sticky” or why it peels off in sheets, it’s usually because you didn’t respect the curing window. When you place an object on uncured paint, a process called “blocking” occurs. The paint on the furniture bonds to the object sitting on it. When you lift the object, the bond between the object and the paint is stronger than the bond between the paint and the wood.
Result? A ruined finish and a lot of frustration.
To avoid this, you need the best paint for furniture flipping: typically mineral or high-quality acrylic paints: but even the best paint will fail if you don’t give it time to breathe.
How to Handle Furniture During the Curing Phase
I know you want to see that beautiful piece styled in your living room immediately. But if you want a professional result that lasts, follow these directive steps during those first 30 days:
1. The “Gentle Use” Rule
For the first 48 hours after painting, don’t put anything on the surface. Nothing. Not even a coaster. After 48 hours, you can enter the “gentle use” phase. You can place items on it, but don’t leave them there permanently.
2. Use Protection (Literally)
If you must style your piece before the 30-day mark, use felt pads on the bottom of every vase, lamp, or tray. Avoid rubber or plastic feet, as these can react with uncured paint and cause it to melt or stick.
3. Let it Breathe
Never cover a freshly painted piece with plastic wrap or a heavy tablecloth. The paint needs airflow to finish the chemical curing process. If you trap moisture under a cover, the paint will stay soft indefinitely.
4. Skip the Scrubbing
If you spill something on your new flip during the first week, don’t reach for the heavy-duty cleaners. Use a barely damp, soft cloth to blot the area. Your paint isn’t water-resistant until it’s fully cured.

Avoid These Common Furniture Flipping Pitfalls
Based on real-world experience (and more than a few ruined tabletops), here are the mistakes that prevent proper curing:
- Applying Coats Too Thickly: Heavy layers trap moisture. It’s always better to do three thin coats than one thick one.
- High Humidity: If you are working in a garage during a humid summer, your cure time will double. Use a fan or move the piece indoors to a climate-controlled room.
- Skipping the Prep: If the paint doesn’t adhere to the wood properly because of grease or old wax, it won’t matter how long you wait: it will eventually peel. Always clean and scuff-sand.
Get the System for Success
If you’re tired of guessing which paints are best or how long you really need to wait, you don’t have to figure it out alone. I’ve turned my years of trial and error into practical, step-by-step tools for you.
- Beginner Furniture Flip System: This is your ultimate blueprint to go from “never held a brush” to “professional flipper” without the overwhelm.
- Paint Brand Guide: Stop wasting money on the wrong products. I break down exactly what works for every surface.
Check out all our digital guides and toolkits here to start your flipping journey with confidence.

Patience Leads to Fabulous Results
The difference between a “DIY project” and a high-end piece of furniture is often just a few weeks of patience. When you allow your paint to cure properly, you are building a finish that can withstand kids, pets, and daily life.
Start your next project with a plan. Track your dry times, set a calendar reminder for the 30-day cure mark, and treat your hard work with the respect it deserves. Your furniture (and your sanity) will thank you.
Ready to find your next project piece? Browse our handpicked shop for inspiration or grab a guide to help you start making money with your new hobby today.