Ever stared at a beat-up dresser on the curb and thought, “I could make that beautiful”? You’re not alone. Upcycling furniture is more than just a creative hobby; it’s a way to save money, help the planet, and even build a profitable side hustle. But if you’ve never picked up a paintbrush or a sanding block, the process can feel overwhelming.
You might be worried about picking the wrong piece, ruining the wood, or ending up with a sticky, peeling mess. I’ve been there. My first flip wasn’t perfect, but it taught me that success comes down to a system, not just talent.
That’s why I created this Proven 5-Step Framework. It’s designed to be stress-free, beginner-friendly, and focused on real-world results. If you want to learn how to upcycle furniture without the guesswork, you’re in the right place. Let’s get started.
Step 1: Find Your Diamond in the Rough
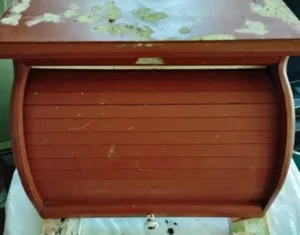
Every great flip starts with a solid foundation. When you’re looking at furniture flipping for beginners, your first goal is to avoid projects that require major structural repairs. You want a "cosmetic" flip: something that mostly needs a facelift.
What to look for:
- Solid Wood: Skip the particle board or IKEA-style laminate for your first few projects. Look for real wood. It’s more forgiving and holds paint better.
- Good Bones: Check the drawers. Do they slide easily? Is the piece wobbly? A little wobble is fixable, but a collapsed frame is a headache you don’t need yet.
- Simple Lines: Avoid overly ornate carvings. They are a nightmare to sand and clean. Stick to clean, classic silhouettes.
Where to hunt:
- Facebook Marketplace: The gold mine of furniture flipping. Set alerts for "free" or "cheap furniture."
- Thrift Stores: Look past the dust and the dated finish.
- Garage Sales: Often the best place to negotiate a killer deal.

Step 2: The Deep Clean (Don’t Skip This!)
You wouldn’t paint a dirty car, right? The same goes for furniture. Years of furniture polish, oils from hands, and dust will prevent your paint from sticking. This is where many beginners fail, and their paint ends up peeling off in sheets later.
Start by removing all the hardware: knobs, hinges, and pulls. Put them in a labeled baggie so you don’t lose them.
Scrub the entire piece with a heavy-duty cleaner. I recommend using TSP (Trisodium Phosphate) or a grease-cutting dish soap like Dawn mixed with warm water. Use a scrubby sponge and get into every nook and cranny. Once you’re done, wipe it down with clean water to remove any soap residue and let it dry completely.
Step 3: Prep Like a Pro (Sanding & Priming)
I know, I know: everyone wants to skip the sanding. But if you want a professional finish that lasts, you need to "scuff sand."
Scuff Sanding
You don’t need to sand the piece down to bare wood. You just need to break the "sheen" of the old finish. Use 120-grit or 150-grit sandpaper. The goal is to create tiny scratches (a "key") so the paint has something to grip onto.
Why Priming Matters
Priming is your insurance policy. It does three things:
- Stops Bleed-Through: Old mahogany or cherry wood often has tannins that "bleed" through white paint, turning it pink or yellow. A good stain-blocking primer stops this.
- Improves Adhesion: It helps the paint stick to the wood.
- Saves Paint: It creates a uniform surface so you need fewer coats of your (expensive) furniture paint.

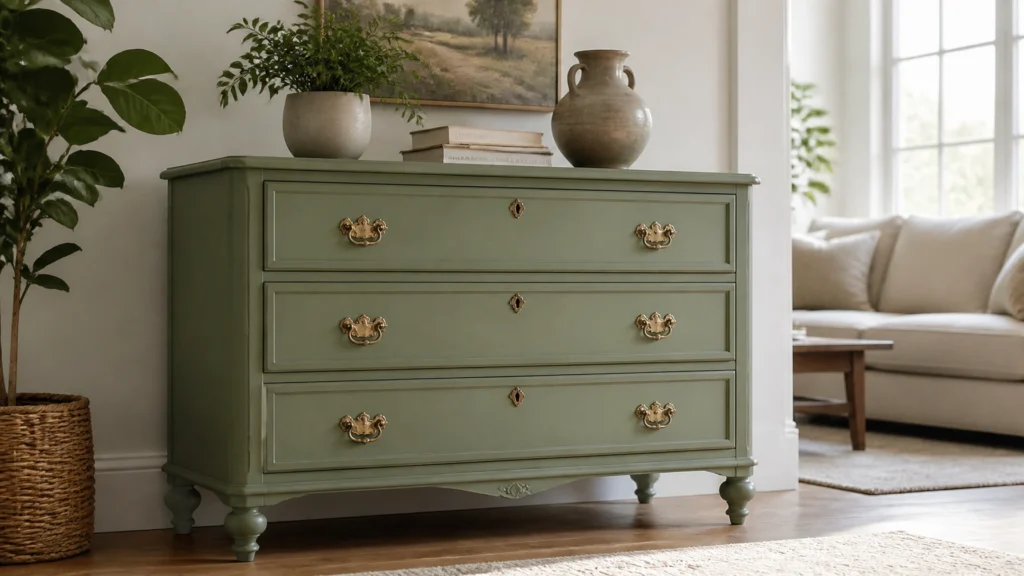
Step 4: The Fun Part: Add the Color
Now that your piece is clean, sanded, and primed, it’s time to paint. This is where the magic happens.
Choose Your Weapon
For beginners, I recommend a high-quality furniture paint (like chalk paint or mineral paint). These are designed to be self-leveling, meaning brush strokes disappear as the paint dries. If you're feeling overwhelmed by choices, my Paint Brand Guide (part of our digital toolkits) breaks down exactly which brands are best for which projects.
Pro Painting Tips:
- Thin Coats: It’s tempting to glob it on to get it done faster. Don’t. Two or three thin coats will always look better and be more durable than one thick, drippy coat.
- High-Quality Brushes: Don’t use a $1 brush from the hardware bin. Invest in a synthetic brush designed for furniture. It makes a massive difference in the finish.
- Sand Between Coats: Once your first coat is dry, very lightly run a 220-grit sanding sponge over the surface. Wipe away the dust and apply the next coat. This results in a buttery-smooth finish.

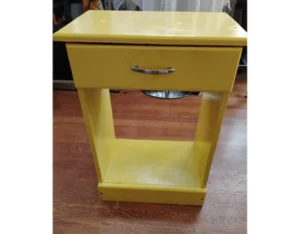
Step 5: Seal and Style for a "Fabulous" Result
The finish line is in sight! But before you put those drawers back in, you must protect your hard work. Furniture paint is porous; without a topcoat, it will stain and scratch easily.
Choosing a Topcoat
- Wax: Great for a vintage, matte look. It requires a bit of elbow grease to buff on and needs to be reapplied every year or so.
- Polyurethane/Polycrylic: This is the "set it and forget it" option. It’s very durable and perfect for high-traffic items like coffee tables or desks.
- Hemp Oil: A natural, easy-to-apply option for a subtle glow.
The Final Flourish
This is my favorite part. Upgrade your hardware. You would be amazed at how much a modern gold handle or a vintage ceramic knob can change the look of a piece. It’s like adding jewelry to an outfit.
Reattach your hardware, slide the drawers in, and take a step back. You just saved a piece of history and created something beautiful.

Turn Your Hobby into a Side Hustle
Once you finish your first flip, you might catch "the bug." You realize that the $20 dresser you just spent $40 on supplies for could easily sell for $250.
If you want to move from "DIY enthusiast" to "Furniture Pro," you need more than just painting tips: you need a business system. Our Beginner Furniture Flip System is a step-by-step blueprint that takes you from finding your first piece to making your first sale.
Learn how to:
- Track your expenses: Use our Profit Planner to ensure you aren't spending your profits on extra supplies.
- Avoid common pitfalls: Save time by following a proven path based on real-world experience, not just theory.
- Market your pieces: Get tips on how to take photos that make buyers hit "purchase" immediately.
You can find all these resources and more at The Crafty Renewal.
Ready to Start Your First Flip?
Upcycling doesn't have to be stressful. By following this 5-step framework, you're cutting out the confusion and focusing on what matters: action.
Get started today:
- Go to a local thrift store.
- Look for a solid wood side table.
- Follow these steps.
You’ve got the tools, the plan, and the mentor. Now, go make something fabulous!