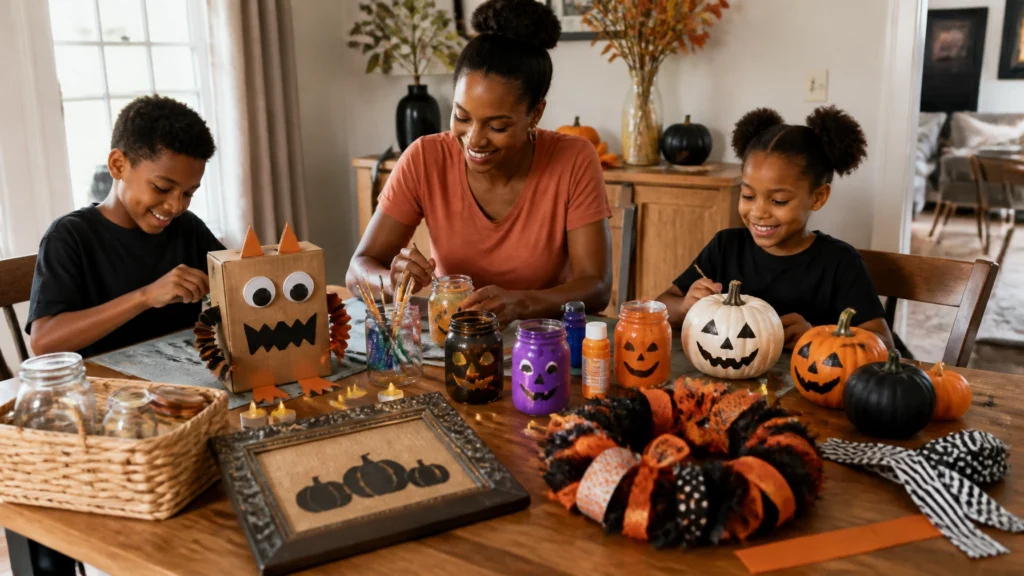
Halloween decorating does not have to mean buying a whole new collection of plastic décor.
With a few thrift store finds, household items, and inexpensive dollar store supplies, kids can create decorations they will be proud to display. The projects are simple, flexible, and easy to finish in an afternoon.
Best of all, they turn ordinary items into something fabulous.
This guide includes five beginner-friendly DIY home decor projects for kids. Adults can handle the tools and tricky steps. Children can choose colors, paint surfaces, add faces, and make each project their own.
Start with a Simple, Low-Cost Craft Station
Before you begin, gather items from around your home. Let the kids help search for materials. This makes the project feel like a creative treasure hunt.
Helpful supplies
- Thrifted: Picture frames, baskets, small jars, fabric scraps, trays, and wooden décor
- Upcycled: Cereal boxes, cardboard tubes, paper bags, clean jars, egg cartons, and shipping boxes
- Dollar store: Googly eyes, ribbon, pipe cleaners, stickers, craft foam, LED tea lights, washable paint, and glue sticks
- Basic tools: Scissors, paintbrushes, markers, newspaper, cardboard, and string
Cover the table with newspaper or a reusable tablecloth. Set out only the supplies needed for the current project. A smaller supply area keeps the process less overwhelming.
Choose washable, non-toxic paint and craft glue whenever possible. Keep a damp cloth nearby for quick cleanups.
1. Turn a Thrifted Frame into a Halloween Sign
A plain picture frame is one of the easiest thrift store finds to transform. Look for a frame with a solid back and a shape your child likes. Scratches and outdated colors do not matter. Paint covers a lot.

Supplies
- One thrifted picture frame
- Cardboard, cardstock, or paper for the sign
- Black, orange, white, or purple craft paint
- Paintbrushes
- Markers or paint pens
- Glue stick or craft glue
- Optional: Foam shapes, stickers, ribbon, or large googly eyes
Steps
- Clean the frame. An adult should remove the glass and wipe the frame with a damp cloth. Let it dry completely.
- Choose the color plan. Let your child pick the frame color and sign design. Traditional orange and black work well, but pink, teal, lime green, and metallic colors can be just as fun.
- Paint the frame. Kids can paint the front and sides with washable craft paint. Allow each coat to dry before adding another.
- Create the sign. Cut cardboard or cardstock to fit the frame. Children can draw pumpkins, ghosts, bats, or monsters. They can also add a short message such as “Boo!” or “Trick or Treat.”
- Add details. Glue on large foam shapes, stickers, or ribbon. Avoid tiny parts if young children are participating.
- Reassemble the frame. An adult should replace the glass or leave it out if the sign will be displayed indoors and the frame looks finished without it.
Adult step
Handle the glass, sharp frame hardware, and any craft knife. Kids can paint, draw, and decorate independently once the frame is prepared.
This project is also a great introduction to furniture refinishing. If your family enjoys the before-and-after transformation, explore The Crafty Renewal’s project gallery for more repurposed furniture ideas.
2. Make Glowing Upcycled Jar Lanterns
Clean jars become charming Halloween lanterns with tissue paper, paint, and large googly eyes. Use battery-powered LED tea lights instead of open flames.

Supplies
- Clean glass jars or sturdy plastic containers
- Orange, purple, white, or black tissue paper
- Craft glue or diluted decoupage glue
- Paintbrushes
- Large googly eyes or paper eyes
- Black cardstock or markers
- Battery-powered LED tea lights
- Optional: Ribbon, yarn, or pipe cleaners
Steps
- Prepare the jars. An adult should remove labels and check for chips or cracks. Choose plastic containers instead of glass for toddlers.
- Apply the tissue paper. Kids can brush a thin layer of glue over the outside of the jar. Place small pieces of tissue paper over the glue, slightly overlapping each piece.
- Seal the surface. Add another thin layer of glue over the tissue paper. Do not worry about perfect coverage. Wrinkles can add texture.
- Create a face. Add large eyes and a simple mouth with cardstock or a marker. Make a friendly ghost, silly monster, or jack-o’-lantern.
- Let it dry. Place the jar on newspaper until completely dry.
- Add the light. Set an LED tea light inside the jar. Keep the lid off or loosely placed so the light is easy to remove.
Adult step
Adults should inspect glass jars, supervise glue use, and place the finished lanterns away from water. Never use an open candle around children, tissue paper, or other flammable decorations.
3. Build a Cardboard Box Monster
This project gives old packaging a second life. A cereal box, shipping box, or paper bag can become a friendly Halloween monster.
Supplies
- Empty cereal box, small shipping box, or paper bag
- Scrap paper or newspaper
- Cardboard scraps
- Washable paint or markers
- Glue sticks
- Large googly eyes
- Craft foam or cardstock
- Optional: Yarn, paper plates, fabric scraps, and stickers
Steps
- Choose the body. Use a box for a standing monster or a paper bag for a simple puppet.
- Cover the surface. Kids can paint the box or cover it with colored paper. Let it dry before decorating.
- Make the face. Cut large eyes, teeth, horns, ears, or eyebrows from cardboard and cardstock.
- Glue the features in place. Children can arrange the pieces until the monster looks just right.
- Add texture. Glue on yarn hair, fabric scraps, paper strips, or tissue-paper scales.
- Give it a job. Use the monster as shelf décor, a candy holder, or a pretend puppet.
For a paper bag puppet, keep the folded flap clear so it can open and close like a mouth.
Adult step
An adult should cut thick cardboard and supervise scissors. Older children can use child-safe scissors with guidance. Younger children can focus on painting, arranging, and gluing pre-cut pieces.
4. Create a Dollar Store Wreath or Garland
A cardboard ring makes a sturdy wreath base. Dollar store ribbon and paper décor provide the color. You can also reuse wrapping paper, gift bags, or old fabric.

Supplies
- Clean cardboard from a shipping box
- Orange, black, purple, or green ribbon
- Glue sticks or craft glue
- Paper bats, pumpkins, ghosts, or stars
- Pipe cleaners
- Scissors
- Optional: Large googly eyes, stickers, and scrap fabric
Steps
- Cut the base. An adult should cut a large cardboard ring. A dinner plate can help trace the outside circle, and a smaller bowl can mark the center.
- Wrap the ring. Kids can wind ribbon, yarn, or fabric strips around the cardboard. Secure the ends with glue or tape.
- Decorate the wreath. Add paper shapes, stickers, and large googly eyes. Encourage kids to create a pattern or embrace a wonderfully messy design.
- Make a hanger. Tie ribbon or a pipe cleaner around the top.
- Create a matching garland. String paper shapes onto yarn or ribbon. Leave space between each shape so the garland hangs neatly.
Adult step
Handle the first cut and any hot glue. A hot glue gun can cause serious burns, so children should not use one unless they are old enough and directly supervised. Glue sticks are a safer option for younger makers.
Keep outdoor wreaths and garlands under a covered area. Bring them indoors during rain or strong wind.
5. Decorate Simple Upcycled Pumpkins
You do not need carving tools to make pumpkin décor. Paper bags, cardboard tubes, and fabric scraps can become colorful pumpkins that last for years.

Supplies
- Brown paper bags, cardboard tubes, or small boxes
- Newspaper or scrap paper for stuffing
- Orange, white, green, or purple paint
- Markers
- Glue
- Fabric scraps, yarn, or ribbon
- Cardboard leaves and stems
- Optional: Stickers and large googly eyes
Steps
- Choose the pumpkin shape. Fill a paper bag with crumpled newspaper and twist the top closed. Or use a cardboard tube for a small pumpkin.
- Paint the body. Kids can paint the surface orange or choose an unexpected color. White pumpkins with black faces look especially striking.
- Add the face. Draw a friendly face with markers or glue on large cardstock shapes.
- Make the stem. Roll brown cardboard, tie a piece of yarn, or glue on a small fabric scrap.
- Add leaves and texture. Attach cardboard leaves, ribbon, or yarn lines around the pumpkin.
- Group the finished pieces. Display several pumpkins together on a shelf, tray, or mantel.
If you are working with very young children, skip small buttons, beads, and loose plastic pieces. Use large paper shapes and stickers instead.
Keep Every Project Safe and Stress-Free
A successful craft session should feel creative: not rushed.
Follow these simple guidelines:
- Sharp tools: Adults should handle craft knives, hole punches, and thick cardboard. Supervise scissors based on each child’s age and ability.
- Hot glue: Adults should use the hot glue gun. Let children point to where pieces should go while the adult applies the glue.
- Paint and glue: Choose non-toxic products and work in a well-ventilated area. Keep paint away from eyes and mouths.
- Candles: Use battery-powered LED lights. Do not place open flames inside jars, cans, or near paper décor.
- Small parts: Avoid tiny pieces for toddlers and preschoolers. Large googly eyes and paper shapes are easier to handle.
- Glass: Check thrifted jars and frames for chips, cracks, and sharp edges. Use plastic when appropriate.
- Outdoor décor: Protect paper, cardboard, and fabric projects from rain. Secure lightweight decorations so they do not blow away.
For additional inspiration, browse the digital project resources from The Crafty Renewal. The goal is always the same: clear, practical steps that help beginners create with confidence.
Make Halloween Decorating More Meaningful
The best Halloween decorations are not always the most expensive ones. They are the pieces your family remembers making together.
Let kids choose the colors. Let them create silly faces. Let the wreath lean a little crooked and the monster have three eyes instead of two.
These small projects teach the same skills used in larger DIY home decor projects: cleaning a surface, choosing a color plan, layering details, and turning an overlooked item into something useful.
That is the heart of upcycling. Start with what you already have. Add a little imagination. Finish with a fabulous Halloween display: without stretching your budget.
When your family is ready to learn how to upcycle furniture, begin with a small thrifted piece such as a tray, stool, or wooden box. You can find more finished inspiration in The Crafty Renewal shop, then use the same step-by-step mindset for your next transformation.