You do not need a big budget to create beautiful fall décor.
You need a few affordable supplies, a simple plan, and the confidence to try. Thrift stores and dollar stores are packed with pieces that can become warm, welcoming accents for your home.
The secret is simple: start with what you already own, shop for useful shapes, and keep your color palette consistent.
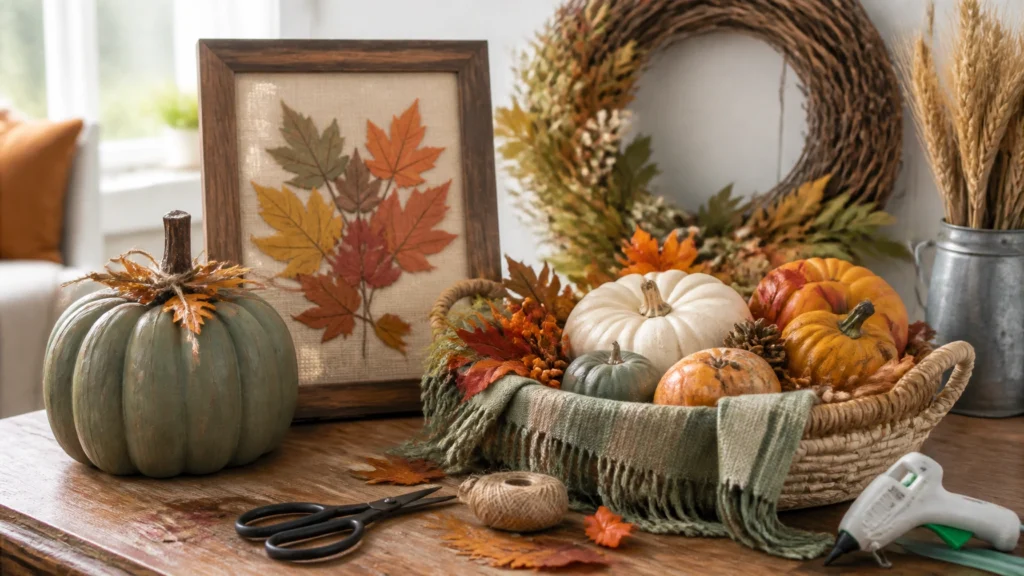
These four beginner-friendly projects turn ordinary items into high-end fall décor. Use them for your entryway, mantel, dining table, porch, or a cozy shelf.
Start With a Simple Fall Color Palette
Before you shop, choose three or four colors. This keeps your projects connected and prevents a cluttered look.
Try:
- Warm neutrals: Cream, beige, tan, and natural wood
- Classic autumn: Rust orange, mustard yellow, burgundy, and brown
- Modern farmhouse: Olive green, black, cream, and muted orange
- Soft fall: Dusty rose, sage green, ivory, and warm terracotta
Look for paint, ribbon, fabric, pumpkins, and leaves in the same color family. Even inexpensive items will look intentional when the palette works together.
Gather Your Budget-Friendly Supplies
You may already have most of what you need.
Thrift store finds
- Wooden picture frames
- Wicker baskets
- Grapevine wreaths
- Glass jars and vases
- Old trays
- Fabric napkins, scarves, or table runners
- Small mirrors or wood plaques
Dollar store supplies
- Faux pumpkins and gourds
- Fall leaves
- Ribbon and jute
- Craft paint
- Foam brushes
- Mini signs
- Pinecones and floral stems
- Wreath forms
- Battery-operated tea lights
Useful supplies from home
- Sandpaper
- Scissors
- Hot glue gun
- Painter’s tape
- Clean rags
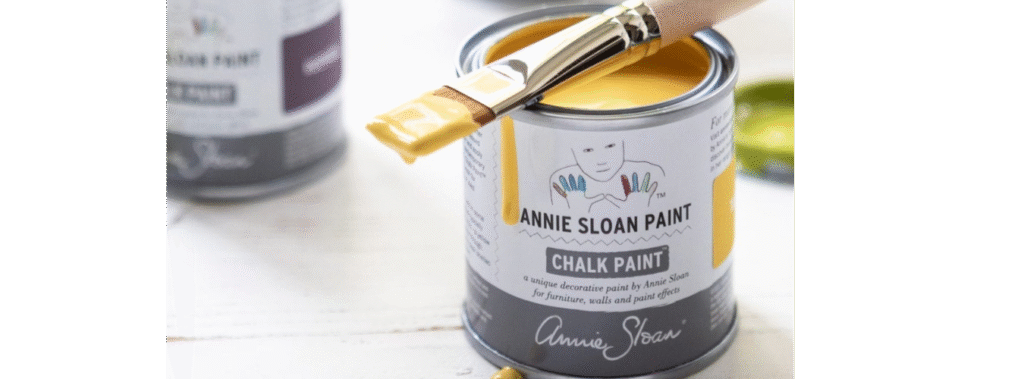
- Leftover furniture paint
- Cardboard for protecting your work surface
Shopping tip: look for shape before color. A dated frame, plain basket, or bright plastic pumpkin can be transformed. You are buying the base, not the finished look.
Project 1: Create a Thrifted Frame Fall Sign

This project gives an old frame a fresh purpose. It works on a mantel, shelf, kitchen counter, or entryway table.
Estimated cost: $3–$10
Estimated time: 30–60 minutes, plus drying time
Difficulty: Easy
Supplies
- Thrifted wooden picture frame
- Scrapbook paper, cardstock, or a scrap piece of thin wood
- Sandpaper
- Cream, olive green, black, or rust-colored paint
- Small paintbrush or foam brush
- Stencil, vinyl lettering, or handwritten design
- Optional: faux leaves, ribbon, or jute
Step-by-step instructions
-
Remove the glass and backing.
Set the glass aside safely. Wipe the frame with a slightly damp cloth to remove dust and grime. -
Scuff the surface.
Lightly sand glossy areas. You do not need to remove every bit of the old finish. Just create a surface the paint can grip. -
Apply your base coat.
Paint the frame with one or two thin coats. Cream creates a soft farmhouse look. Olive green feels earthy and current. Black gives the piece a more dramatic finish. -
Let the paint dry fully.
Thin coats dry faster and create a smoother result. Resist the urge to add thick paint. -
Add your fall message.
Use a stencil, printed phrase, or your own handwriting. Try simple wording such as “Gather,” “Welcome Fall,” or “Thankful.” -
Distress the edges, if desired.
Once dry, lightly sand the corners and raised edges. This reveals small areas of the original finish and adds character. -
Finish the sign.
Place your paper or wood insert inside the frame. Add a small faux leaf, jute bow, or ribbon accent to one corner.
For more inspiration, browse The Crafty Renewal shop for examples of how repurposed finishes and simple details can elevate everyday home décor.
Project 2: Give a Dollar Store Pumpkin a Designer Makeover

A bright orange plastic pumpkin can look completely different with the right paint color and finish.
Estimated cost: $2–$8
Estimated time: 30–45 minutes, plus drying time
Difficulty: Easy
Supplies
- Foam or plastic pumpkin
- Fine-grit sandpaper, if using plastic
- Acrylic paint or leftover furniture paint
- Small brush or foam brush
- Optional: primer
- Twine, ribbon, or a cinnamon stick
- Hot glue
- Clear sealer, if needed
Step-by-step instructions
-
Clean the pumpkin.
Wipe away dust, stickers, and residue. Allow it to dry completely. -
Prepare the surface.
Lightly sand a plastic pumpkin. Foam pumpkins can usually be painted without sanding. If the surface is very slick, add a light coat of primer. -
Paint the base color.
Apply thin coats. Paint along the pumpkin’s natural grooves instead of brushing randomly across them. -
Build the finish slowly.
Add a second coat after the first one dries. For dimension, lightly dry-brush a lighter shade over the raised ridges. -
Add texture.
Wrap the stem with jute or replace it with a cinnamon stick. Secure it with a small amount of hot glue. -
Distress for an aged look.
Lightly sand a few ridges or edges. Stop as soon as the original color begins to show. -
Seal the pumpkin.
Use a clear water-based sealer for indoor décor. Follow the product instructions and allow it to cure before handling.
Try olive green, muted cream, dusty blue, or terracotta instead of traditional orange. If you have leftover paint from a furniture project, this is a perfect way to use it.
The same prep-and-paint process works on thrifted wood décor, small stools, trays, and accent tables. That is the foundation of successful DIY furniture refinishing: clean, prep, paint, and finish with patience.
Project 3: Build a Budget-Friendly Fall Centerpiece

A centerpiece does not need to be complicated. Use one thrifted container and repeat a few seasonal shapes.
Estimated cost: $5–$15
Estimated time: 20–30 minutes
Difficulty: Beginner
Supplies
- Thrifted wicker basket, bowl, or wood tray
- Fabric scrap, napkin, or burlap
- Dollar store mini pumpkins and gourds
- Faux leaves
- Pinecones, acorns, or small branches
- Optional: battery-operated tea lights
Step-by-step instructions
-
Clean your container.
Dust the basket or wipe the tray. If the item has a strong odor, let it air outside before using it. -
Add a soft base.
Fold fabric or burlap inside the container. This adds texture and helps lift smaller items. -
Place the largest pieces first.
Put taller pumpkins, gourds, or branches toward the back. This creates height. -
Layer in medium pieces.
Add smaller pumpkins and leaves around the larger items. Turn each piece until the best side faces outward. -
Fill the gaps.
Tuck pinecones, acorns, faux berries, or small branches between the pumpkins. These small details make the arrangement feel abundant. -
Check the centerpiece from every angle.
Rotate the basket and adjust any empty areas. Keep the arrangement slightly uneven for a natural look. -
Add a safe glow.
Place battery-operated tea lights nearby or inside a suitable glass container. Avoid open flames around fabric, faux leaves, and dried materials.
For a more polished result, repeat one finish throughout the display. For example, choose all cream pumpkins with olive green leaves, or use rust pumpkins with natural wood and burlap.
Project 4: Make an Upcycled Fall Wreath for Your Door

A wreath is one of the fastest ways to refresh your doorway. You can reuse an old wreath base or build one from a dollar store form.
Estimated cost: $8–$20
Estimated time: 45–75 minutes
Difficulty: Easy to moderate
Supplies
- Thrifted grapevine wreath or dollar store wreath form
- Faux fall leaves
- Mini pumpkins or gourds
- Faux flowers, berries, or pinecones
- Floral wire or hot glue
- Ribbon for hanging
- Optional: outdoor-rated clear sealer
Step-by-step instructions
-
Inspect the wreath base.
Remove faded decorations, loose pieces, and old ribbon. Save anything that can be reused. -
Plan before attaching.
Arrange your largest pieces on the wreath first. A partial design on one side or across the lower half often looks more modern than evenly covering the entire base. -
Secure the focal pieces.
Attach mini pumpkins, flowers, or a small sign with floral wire. Wire makes seasonal changes easier. -
Layer in the leaves.
Tuck leaves behind the larger pieces. Overlap them so the base looks full. -
Add texture.
Place pinecones, berries, twigs, or fabric ribbon between the leaves. Use odd numbers of similar items for a balanced arrangement. -
Tie on the ribbon.
Choose a wide ribbon in rust, cream, olive, or plaid. Make a loop for hanging or create a simple bow. -
Check the balance.
Hang the wreath temporarily. Step back several feet. Adjust anything that looks too heavy or too empty.
Weatherproofing tips
- Use outdoor-rated faux greenery when possible.
- Keep paper, untreated fabric, and delicate decorations under a covered porch.
- Secure lightweight pieces with floral wire instead of glue alone.
- Spray only with a sealer labeled for the materials you are using.
- Bring the wreath indoors during heavy rain, strong wind, or freezing weather.
You can also create a doorway vignette with a thrifted stool, painted basket, faux pumpkins, and a lantern. For ideas on combining practical storage with decorative finishes, see this blue wooden step stool with storage.
Make Your Fall Décor Look More Expensive
Use these simple styling upgrades:
- Repeat colors across every project.
- Mix textures such as wood, glass, fabric, metal, and greenery.
- Vary heights so displays do not look flat.
- Leave breathing room around each arrangement.
- Group items in threes for an easy, balanced display.
- Use one statement piece instead of filling every surface.
Most importantly, do not wait for perfect supplies. A scratched frame, faded basket, or plain pumpkin is not a problem. It is a starting point.
Finish One Small Project First
Choose the easiest project and complete it before buying more supplies. That first successful makeover builds momentum.
Start with the frame sign or painted pumpkin. Then use the same paint colors and materials for your centerpiece and wreath. This creates a coordinated fall look without buying a complete new collection.
That is the power of upcycling: forgotten pieces become fresh, useful, and fabulous. With a step-by-step system and a little patience, you can create welcoming fall décor for less: and gain the confidence to tackle bigger repurposed furniture ideas next.