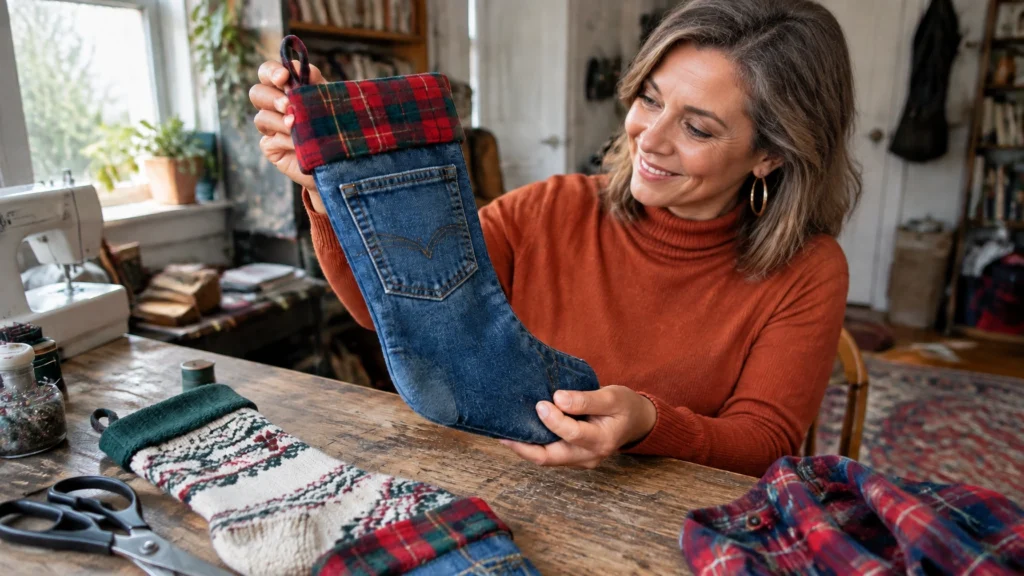
You don’t need a trip to the fabric store to make a memorable Christmas stocking. Look in your closet or visit a thrift store. Old jeans, sweaters, and flannel shirts can become warm, one-of-a-kind holiday décor.
This beginner-friendly project is forgiving, useful, and a lovely way to give worn clothes a second life. Choose one fabric or mix a few. Then follow the steps below to make a lined stocking, or try the no-sew option if you don’t have a sewing machine.
Gather fabrics that hold their shape
Start with clean, sturdy garments. Medium-weight fabric is easiest to cut and handle. Look for strong seams, intact fabric, and details you can reuse.
- Sturdy denim: Cut from a jeans leg and keep the original seams, belt loops, or back pocket for character.
- Cozy sweaters: Choose a felted or tightly knit sweater if possible. Sleeves make lovely cuffs, but unfinished knit edges can unravel.
- Soft flannel: Reuse a shirt’s button placket, chest pocket, or finished cuff as a decorative feature.
- Textured corduroy: Old pants offer a durable outer fabric with a subtle ribbed finish.
- Warm plaid wool: A worn blanket can become a classic stocking shell or cuff.
- Lightweight embroidered fabric: An old embroidered napkin can add a special lining or trim.
Avoid thin, stretchy jersey. It can sag under the weight of stocking stuffers. If you want to use a stretchy sweater, add a stable woven lining.

Gather your tools and supplies
You’ll need:
- Fabric scissors
- Paper for a stocking template
- A stocking outline, either drawn by hand or traced from a stocking you own
- Pins or clips
- An iron
- A sewing machine and thread or fabric glue for a no-sew version
- Optional fusible web for securing light trim
- Lining fabric, such as cotton, flannel, or an old embroidered napkin
Wash and dry the garments before cutting. This removes dirt and lets you see how the fabric behaves after laundering. Remove anything you don’t want in the finished design, such as stray tags or bulky hardware.
Make a simple paper pattern
Draw a stocking shape on paper, or trace around an existing stocking. Add about ½ inch around the outline for seam allowance if your pattern doesn’t already include one. Make the shape a little larger than you think you need; a narrow stocking can be tricky to turn and fill.
Mark the top opening, heel, and toe. Decide where you want a pocket, shirt buttons, or a jeans seam to appear. Place your pattern on the garment and plan those details before cutting.

Sew a basic lined stocking
- Cut the outer pieces. Fold the fabric or position your paper pattern on it. Cut two stocking shapes, making sure they’re mirror images. Keep the top open.
- Add details first. Sew or pin a pocket, name, or decorative fabric piece to the front before joining the stocking pieces.
- Join the outer shell. Place the two pieces with their right sides facing each other. Pin around the curved edge. Sew with a straight stitch, leaving the top open. Go slowly over thick seams.
- Shape the curves. Trim bulky seam allowance and make small snips around the curves without cutting through your stitching. Turn the stocking right-side out.
- Make the lining. Cut and sew two lining pieces using the same steps. Leave the lining wrong-side out.
- Add a hanging loop. Fold a 5-inch strip of ribbon, twill tape, or a saved jeans belt loop in half. Place the ends at the back of the stocking opening, with the loop pointing down inside the top edge. Secure it in the next seam.
- Join lining and shell. Slide the outer stocking inside the lining so the top edges meet. Stitch around the opening, catching the loop ends. Turn the stocking through the opening so the lining sits inside. Tuck the top edge neatly and press.
A lining gives the stocking structure and helps it hold its shape. It’s especially helpful for sweater fabric.
Try a no-sew stocking
No sewing machine? Use fabric glue and a stable fabric such as denim or flannel.
- Cut two mirrored stocking shapes.
- Apply a thin line of fabric glue along the sides and toe of one piece. Keep glue away from the top opening.
- Press the second piece on top, matching the edges. Follow the glue label for drying and curing time.
- Fold the top edge down to make a cuff, or glue on a finished shirt cuff or sweater sleeve cuff.
- Form a loop from twine, ribbon, or a jeans belt loop. Glue it inside the back top edge. Add a small fabric patch over the attachment for extra support.
Let the stocking cure fully before hanging it. Glue-only seams are best for lightweight treats, not heavy gifts.
Give each fabric its own character
Denim: keep the pocket
Use a jeans leg for the stocking body. Position the back pocket on the front as a handy gift-card holder. A belt loop can become the hanging loop. If you’re sewing through thick denim, avoid stacking several bulky seams at one point.
Sweater: turn a sleeve into a cuff
Cut the stocking body from the sweater and reuse a sleeve as the cuff. A felted sweater is easier to work with because it is less likely to unravel. For an un-felted knit, enclose the cut edges in the lining and avoid stretching the fabric as you sew.
Flannel: show off the shirt details
Keep the shirt buttons on the front as decoration. Add the chest pocket to hold a small note or candy cane. A finished shirt cuff can become a quick, tidy stocking cuff.

Personalize it with easy finishing touches
Make your stocking feel personal without adding complicated steps.
- Paint a name: Use fabric paint and let it dry according to the label.
- Add initials: Embroider a few simple stitches or attach ready-made letters.
- Make pom-poms: Cut narrow strips from sweater scraps and tie them into soft trim.
- Use thrifted buttons: Sew them on securely, or choose fabric glue if you’re making a no-sew version.
- Add a little sparkle: Tie on twine, a repurposed key, or a small charm.
For a simple hanging loop, reuse a jeans belt loop or a flannel shirt cuff strip. Fold it in half and secure both ends inside the top seam. Tug gently to check that it’s firmly attached before hanging the stocking.
Beginner mistakes to avoid
- Skipping the lining: Stretchy or soft fabric can slump. Add a woven lining to help the stocking keep its shape.
- Cutting before washing: A garment may shrink or change texture after its first wash. Wash and dry it before you make your pattern pieces.
- Ignoring knit stretch: Sweater fabric can lengthen and sag. Stabilize it with a lining, and avoid pulling the knit while sewing.
- Forcing thick seams through the machine: Denim layers can be bulky. Sew slowly, reduce stacked layers where you can, and don’t pull the fabric through the machine.
Style your stockings with an upcycled mantel
Hang your finished stockings with greenery, simple ribbon, or a few natural branches. Add a thrifted candlestick, small tray, or frame to bring the display together. A painted thrifted piece can add a fresh pop of color; for a furniture-paint project, use Dixie Belle Paint and follow its preparation and drying directions. Explore more paint inspiration from The Crafty Renewal.
These handmade stockings also make a sweet addition to your seasonal DIY home décor projects. For more repurposed furniture ideas, look through The Crafty Renewal’s upcycling and décor projects.
Keep building your DIY confidence
Ready for another practical project? Explore these step-by-step tools from The Crafty Renewal:
- Beginner Furniture Flip System
- Mistake Proof Furniture Flip Blueprint
- Paint Brand Guide
- Profit Planner
You don’t need perfect fabric or expert sewing skills to make something special. Start with a sturdy garment, take it one step at a time, and turn forgotten clothes into stockings your family will look forward to hanging every year.