If your furniture flip didn’t turn out the way you hoped, there’s a good chance the problem wasn’t the paint.
It was the prep.
Proper preparation is what separates a smooth, professional-looking finish from peeling paint and uneven texture. In this beginner guide, I’ll walk you step-by-step through the exact furniture prep process I follow before painting or staining.
And if you want a printable version of this checklist, you can grab my free Beginner Furniture Flip Checklist here:
https://thecraftyrenewal.com
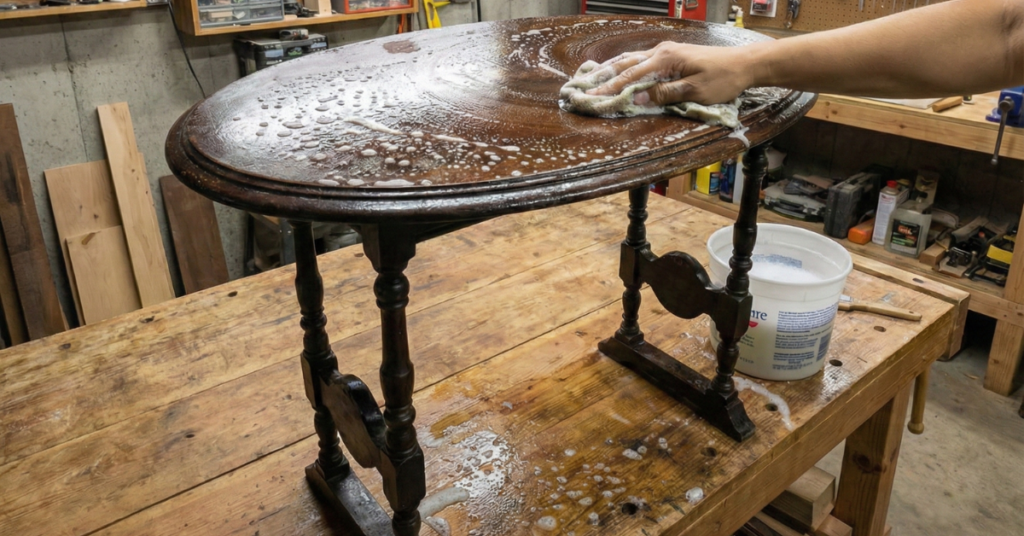
Step 1: Clean the Piece Thoroughly
Before sanding or priming, remove all dirt, grease, and residue.
Use:
• Mild soap and water
• Degreaser if needed
• Clean cloth
Kitchen pieces especially may have invisible grease buildup. Paint will not adhere properly to a dirty surface.
Let the piece dry completely before moving on.
Step 3: Sand Lightly (Do Not Skip This)
Sanding helps remove sheen and gives primer something to grip.
For beginners, an orbital sander makes the job much easier. If you’re unsure which tools are helpful, I’ve listed the ones I personally use here:
https://thecraftyrenewal.com/recommended-tools
You don’t need to sand down to raw wood unless the finish is failing. A light scuff sand is often enough.
Wipe the piece down thoroughly after sanding.
Step 4: Repair Small Imperfections
Fill:
• Small dents
• Nail holes
• Minor cracks
Use wood filler and allow it to dry fully before sanding smooth.
This small step dramatically improves the final look.
Step 5: Prime When Needed
Primer is not always required — but beginners should use it more often than they think.
Use primer if:
• The piece is dark and you’re painting light
• There are stains or knots
• The surface is glossy
• You’re covering strong wood tones
Primer improves durability and prevents bleed-through.
Step 6: Final Wipe Down
Before applying paint:
• Remove dust
• Use a tack cloth if needed
• Make sure surface is dry
Dust left behind will show in your finish.
Step 7: Take Your Time
Rushing prep leads to:
• Chipping
• Peeling
• Uneven texture
Prep may not be the exciting part of flipping furniture, but it is the most important part.
Slow down at the beginning so you don’t redo it at the end.
Final Thoughts
A beautiful furniture makeover starts long before the paintbrush touches the surface.
If you’re just getting started, download the free Beginner Furniture Flip Checklist to guide you step-by-step through choosing and prepping your first piece:
Prep builds confidence. Confidence builds momentum.
– Tracy
The Crafty Renewal