Planning a wedding is a whirlwind of dreams, decisions, and: let’s be honest: daunting price tags. But here’s a secret from someone who lives and breathes upcycling: your “fabulous” doesn’t have to cost a fortune. If you’re dreaming of a summer wedding that feels personal, curated, and high-end, the local thrift store is your best friend.
Right now, the wedding world is leaning hard into “Modern Heritage.” This style is all about mixing classic, collected items with bold colors and romantic florals. It celebrates the unique over the mass-produced. By thrifting your centerpieces, you aren’t just saving money; you’re creating a story.
At The Crafty Renewal, I believe every piece of “junk” has a second life waiting to happen. Whether you’re a total DIY beginner or a seasoned flipper, creating your own wedding decor is the ultimate way to inject your personality into your big day.
Let’s dive into four foolproof centerpiece styles you can create using thrifted treasures.
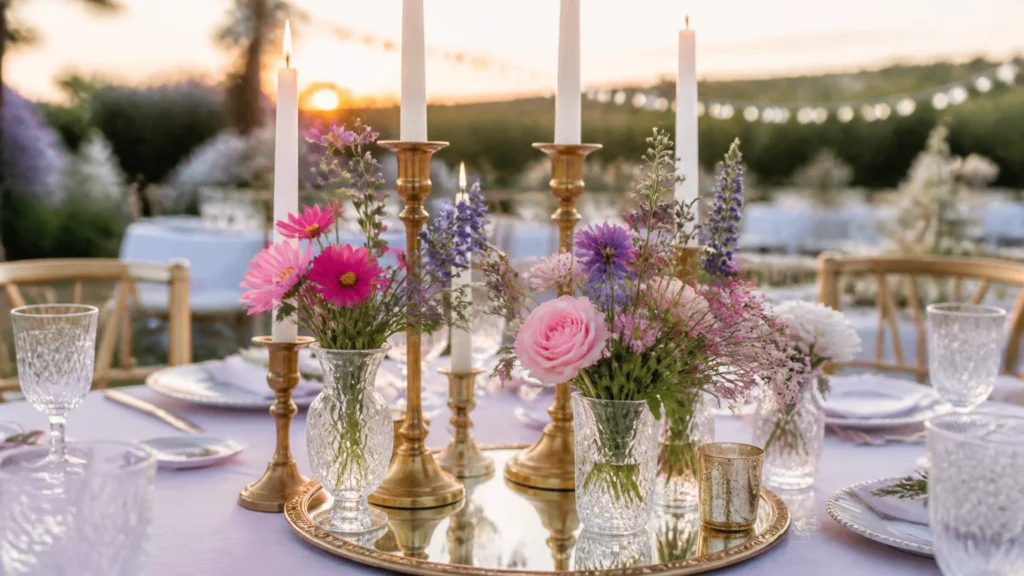
1. The Modern Heritage Cluster: Brass, Crystal, and Glow
This look is timeless, elegant, and perfectly fits the trend of mixing textures. The goal is to create a cluster that feels like it was inherited from a chic estate rather than bought from a big-box retailer.
The Thrift List
- Brass Candlesticks: Look for varied heights and shapes. Don’t worry if they’re a bit tarnished: a little patina adds character.
- Cut-Crystal Glassware: Small vases, glasses, or even bowls.
- Small Mirrors or Trays: These serve as the “ground” for your cluster.
The Step-by-Step Build
- Polish (Lightly): Use a soft cloth to clean your brass. Leave a bit of the dark tarnish in the crevices for that “heritage” feel.
- Clean the Crystal: Soak your glassware in warm, soapy water with a splash of vinegar to make them sparkle.
- Group in Threes: On each table, place three candlesticks of different heights on a mirror base.
- Add the Accent: Place one small crystal vase next to the candles. Add 2–3 stems of a bold summer flower like a deep purple ranunculus or a bright pink rose.

2. Color-Pop Bud Vase Garden: Whimsical and Airy
For a daytime or garden wedding, nothing beats the charm of a bud vase “garden” stretching down the center of the table. This is one of the easiest DIYs to batch-produce.
The Thrift List
- Colored Glass Bottles: Look for blues, ambers, and greens.
- Tiny Bud Vases: Check the “miscellaneous” shelf at the thrift store.
- Vintage Linens: Look for lace runners or embroidered napkins to lay under the vases.
Why This Works
This style leans into bold color. Instead of one massive (and expensive) floral arrangement, you use multiple single stems. It creates a light, airy feeling that’s perfect for summer.
Pro Tip
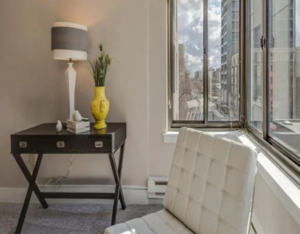
Keep your flower colors consistent across the table. If you have amber glass, go with warm tones like yellow and peach. If you have blue glass, try crisp whites and soft lavender. If you’re feeling overwhelmed by the technical side of prepping these items, check out my Project Gallery for more inspiration on how to handle different materials.
3. The Literati Stack: Old World Romance
If you love a vintage, literary vibe, this centerpiece is for you. It’s sturdy, interesting, and provides a great height for table numbers.
The Thrift List
- Hardcover Books: Look for pretty spines in your wedding colors. Blue and gold or forest green and cream are classics.
- Small Stoneware Pitchers: Or teacups and creamers.
- Mini Frames: For table numbers or romantic quotes.

How to Style It
- Stack with Intention: Place 3 books in a stack. If you’re worried about them sliding, use a tiny piece of museum putty between the layers.
- The Crown Jewel: Place your pitcher or teacup on the very top book. Fill it with a small posy of wildflowers.
- The Final Touch: Lean a small thrifted frame against the books to display the table number.
4. The Boho Glow: Upcycled Lanterns
For evening receptions, you want a centerpiece that provides warmth and light. Thrifted lanterns are often outdated in color but have amazing bones.
The Thrift List
- Metal Lanterns: Any color will do: we’re going to paint them!
- Birdcages: These work great for a more whimsical, boho look.
- Pillar Candles or LED Candles.
The Transformation
This is where your inner furniture flipper comes out. Most thrifted lanterns are a dated brass or a scratched white.
- Clean & Sand: Wipe down the metal and give it a very light scuff-sand.
- Unify with Paint: Use a matte black or a sophisticated champagne gold spray paint. Painting all your lanterns the same color makes them look like a coordinated set rather than a random collection.
- The Wreath: Wrap a small greenery ring (eucalyptus or ivy) around the base of the lantern once it’s dry.

If you’re new to painting metal or wood and want to make sure your finish is flawless, my Beginner Furniture Flip System is the perfect blueprint. It teaches you the exact steps to get a professional finish on any surface: ideal for making sure your wedding decor looks expensive!
The Step-by-Step Blueprint for Batching
When you’re making 15, 20, or 30 centerpieces, you need a system. Don’t just wing it!
- Step 1: The Prototype. Create one perfect version of your centerpiece. Take a photo of it. This is your “Blueprint.”
- Step 2: The Thrift Haul. Take your blueprint photo to the thrift store. Only buy items that fit the vibe.
- Step 3: The Assembly Line. Don’t finish one centerpiece at a time. Clean all the glass. Paint all the lanterns. Stack all the books. This is much faster and ensures consistency.
- Step 4: The Storage. Store your finished centerpieces in sturdy bins with bubble wrap. Label each bin by table number if they vary.

Pro Tips for the Savvy Bride (or Groom)
- Mix Intentionally: You don’t need every table to be identical. You can do half “Book Stacks” and half “Candle Clusters.” Just keep the flower types and candle colors the same to tie the room together.
- Don’t Overlook “Junk”: A weird-shaped ceramic pitcher can look like a designer piece with a coat of textured “stone” spray paint.
- Start Early: Thrifting takes time. Start your hunt 6 months out so you aren’t panic-buying at full price the week of the wedding.
- Check the “Profit Planner”: If you’re doing this to save money (or if you’re thinking about renting out your decor after the wedding!), use a tool like my Profit Planner to track your spending and see exactly how much you’ve saved.
Get the Confidence to Create
Thrifting your wedding decor is an adventure. It’s about finding the beauty in the forgotten and turning it into something “fabulous.” If you’re feeling a little nervous about your DIY skills, I’m here to help. My guides are built for beginners: no theory, just real-world, practical advice.
Ready to start your flipping journey?
- Explore the Shop: Get your hands on the Beginner Furniture Flip System and my Paint Brand Guide.
- See the Gallery: Get inspired by real transformations.
Your wedding should reflect you. So, grab your keys, head to the nearest thrift store, and start hunting for those hidden gems. You’ve got this!