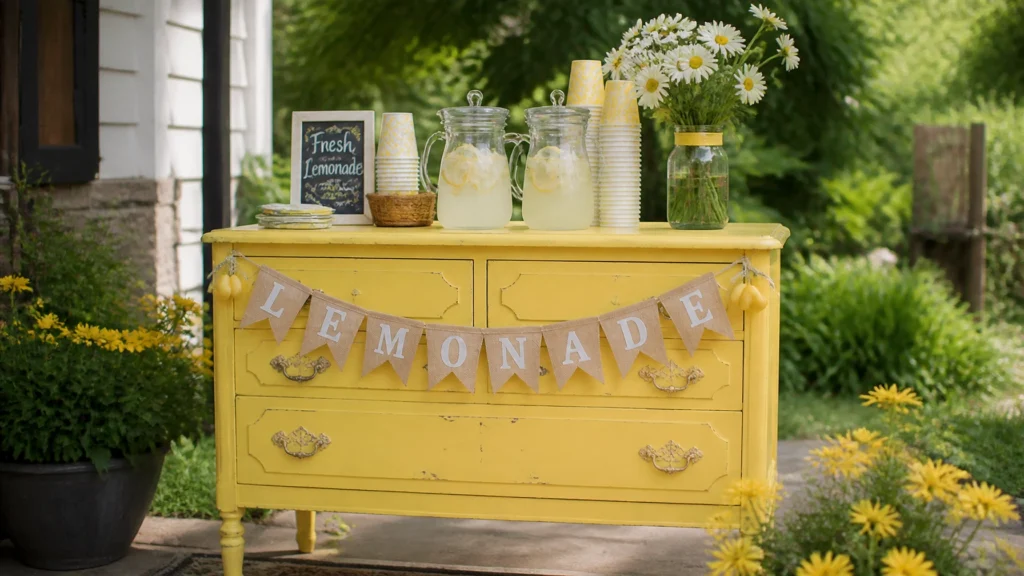
Nothing says summer quite like the clink of ice in a glass of cold lemonade. But why serve your guests from a wobbly plastic folding table when you could have a show-stopping, custom-built drink station?
Turning an old, forgotten dresser into a summer lemonade bar is one of the most rewarding beginner-friendly projects you can tackle. It’s practical, it’s creative, and it’s a guaranteed conversation starter for your next backyard BBQ.
At The Crafty Renewal, I focus on real-world projects that take the guesswork out of DIY. You don’t need a workshop full of expensive tools or years of experience. You just need a solid plan and a little bit of sunshine.
Ready to build the ultimate outdoor hosting station? Let’s dive in.
Start with the Right Bones: Finding Your Dresser
Before you grab a paintbrush, you need the right “canvas.” Not every dresser is destined for outdoor life. When you’re hunting at thrift stores or Facebook Marketplace, look for these three key features:
- Height is Hero: Look for a “waist-high” dresser (usually around 34-36 inches). You want a comfortable serving height so guests aren’t hunching over to pour a drink.
- Solid Wood Construction: Avoid particle board or MDF. These materials soak up moisture like a sponge and will crumble the first time it rains. Stick to solid wood or high-quality plywood.
- Sturdy Surface: Check the top for major warping. A little character is fine, but you want your pitchers of lemonade to sit level!
If you’re unsure where to start your hunt, check out our furniture gallery for inspiration on the types of pieces that make great flips.
Step 1: Prep for Success
The secret to a professional-looking finish isn’t the paint: it’s the prep. If you skip this part, your paint will peel faster than a summer sunburn.

Clean It Deep
Start by removing all hardware. Give the entire piece a thorough scrub with a degreaser or a simple mix of warm water and dish soap. You need to remove years of dust, furniture polish, and grime.
Scuff Sanding
You don’t need to sand the dresser down to bare wood. You just need to “scuff” the surface so the new paint has something to grip. Use a medium-grit sandpaper (around 120-grit). This creates a “tooth” for your primer and paint to bite into.
For more detailed prep advice, browse our restoration tips.
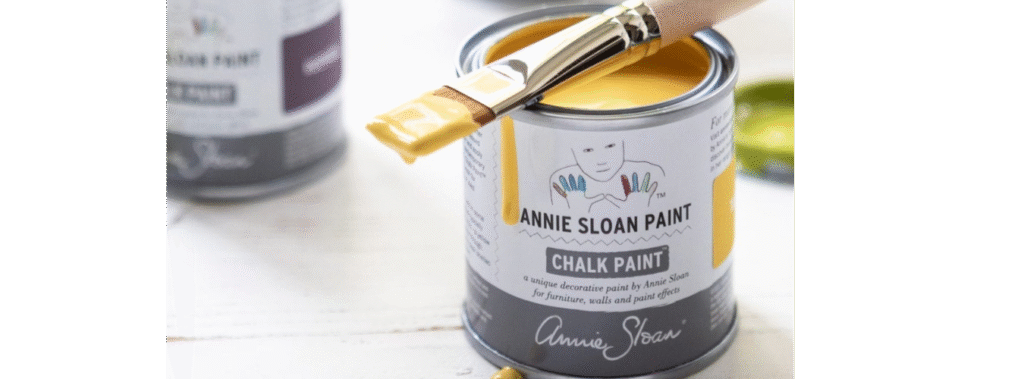
Step 2: Choose the Right Armor (Paint and Primer)
Since this piece will be living on a porch or patio, it needs protection from the elements. This is where most beginners get stuck. Should you use chalk paint? Latex? Milk paint?

The Primer Phase
Always use a high-quality, stain-blocking primer. This prevents the “tannins” in old wood from bleeding through your beautiful new color. If you’re painting your bar a bright yellow or white, this step is non-negotiable.
The Paint Phase
Go for an Exterior Latex or a dedicated Outdoor Furniture Paint. These are formulated to expand and contract with temperature changes and offer better UV protection so your colors don’t fade in the sun.
Penny’s Pro Tip: Need help picking the right brand for your climate? My Paint Brand Guide takes the mystery out of the paint aisle. I’ve tested the top brands so you don’t have to waste money on products that don’t last.
Step 3: Add the “Bar” to Your Dresser
Now for the fun part! We’re going to transform this from a bedroom staple into a functional drink station.

- Install a Bottle Opener: Screw a vintage-style cast iron bottle opener onto the side of the dresser. It’s a small detail that makes a huge impact.
- Add Towel Hooks: Drinks are messy. Add a few sturdy hooks to the opposite side for hand towels or even a small trash bag.
- Casters for Mobility: Want to move the party from the porch to the lawn? Install heavy-duty locking casters on the bottom. This makes your lemonade bar mobile and keeps the wood feet off the damp ground.
- Remove a Drawer: Consider removing one of the bottom drawers entirely. You can paint the interior and use the open space to hold a small galvanized tub filled with ice and bottled drinks.
Step 4: Style for the Season
A lemonade bar is as much about the “vibe” as it is about the beverage.

- The Flow: Place cups and napkins on the left, your main pitchers in the middle, and garnishes (mint, lemon slices, berries) on the right. This creates a natural “assembly line” for your guests.
- Signage: Use a small chalkboard or a printed menu to let guests know what’s on tap. “Classic Lemonade,” “Strawberry Basil,” or “Sparkling Limeade” are always hits.
- Layer the Height: Use wooden crates or cake stands on top of the dresser to create different levels. It makes the station look more professional and keeps items within easy reach.
From Hobby to Hustle
Do you love the process of hunting, prepping, and painting? This project isn’t just for your own porch. Refurbished drink stations and “outdoor bars” are high-demand items on the resale market during the spring and summer months.
If you’re interested in making a profit from your flips, check out our Profit Planner. It helps you track your costs, from the initial dresser purchase to the last screw, ensuring you actually make money on your hard work.
Ready to Flip Your First Piece?
If you’ve been sitting on the sidelines, waiting for the “perfect” time to start furniture flipping, this is it. You don’t need to be an expert woodworker to create something fabulous. You just need the right system.
My Beginner Furniture Flip System is designed specifically for people like you. It’s a step-by-step blueprint that guides you through your very first project without the overwhelm. From finding the right tools to the final topcoat, I’m with you every step of the way.
Stop scrolling and start creating. Let’s turn that old dresser into the star of your next summer party!
Get the Beginner Furniture Flip System here!