You’ve spent all weekend sanding, priming, and painting. You found a hidden gem at a local thrift store for twenty bucks, and now it’s a stunning, mid-century modern masterpiece. You’re ready to list it and finally see some profit from your furniture flipping side hustle. But when you snap a photo in your dimly lit garage and post it online, the only offers you get are for $40.
What gives?
The truth is, people don't buy furniture; they buy a feeling. They buy the way that dresser will look in their bedroom on a sunny Sunday morning. If your photo looks like a "project," people will pay project prices. If your photo looks like it belongs in a high-end boutique, they’ll pay boutique prices.
At The Crafty Renewal, we believe you don’t need a $2,000 DSLR camera to make your work look professional. You just need a smartphone and a few "insider" staging secrets. Here is your blueprint for turning $20 flips into $500 paydays.
Banish the "Garage Glow" with Natural Light
Lighting is the single most important factor in photography. You can have the most beautiful paint job in the world, but if the lighting is yellow and muddy, your piece will look cheap.
The "Garage Glow", that harsh, overhead yellow light from a shop bulb, is a value killer. It creates weird shadows and distorts the true color of your paint.
The Secret: Shoot your furniture near a large window or an open garage door during the "Golden Hour" (early morning or late afternoon). You want bright, indirect light. Direct sunlight is too harsh and creates "blown-out" white spots, while shade can make colors look flat.
- Turn off all indoor lights: Mixed lighting (sunlight + yellow lightbulbs) confuses your phone's camera and makes editing a nightmare.
- Face the light: Position your furniture so the light hits the front and side of the piece. This creates depth and highlights the texture of your work.
- Avoid the flash: Never, ever use your phone's flash. It flattens the image and makes everything look dated.

Create a "Blank Canvas" Background
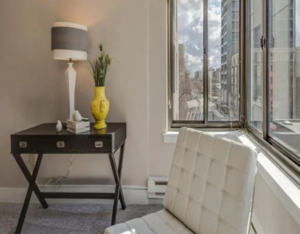
If your background is cluttered with paint cans, laundry, or a messy workshop, the buyer’s eye will wander away from your beautiful flip. You want the furniture to be the undisputed star of the show.
You don't need a professional studio. A clean, neutral wall is your best friend. If you don't have a plain wall, you can create a temporary "stage" using a large piece of plywood painted in a soft white or light gray.
The Secret: If your floor is ugly, don't let it ruin the shot. Throw down a neutral area rug or a few planks of vinyl flooring from the hardware store. This small investment creates a "room" feel that instantly adds $100 to the perceived value.
Keep your background simple. A "boutique" look is minimalist. If you look at our project gallery, you'll notice that the most successful flips are photographed against clean, uncluttered spaces.
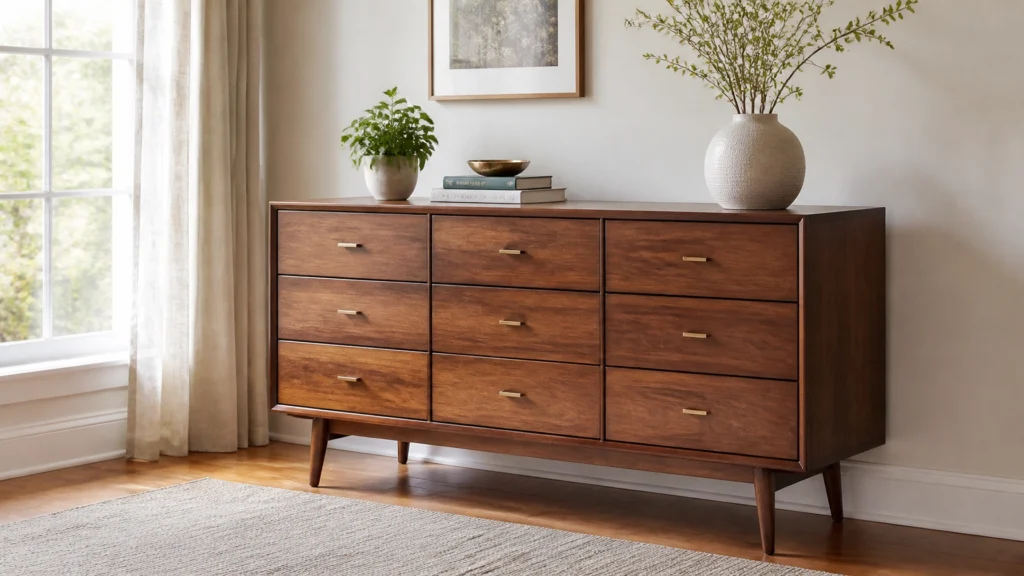
Stage for the Lifestyle, Not the Sale
Staging is where the magic happens. This is where you tell the buyer, "This piece belongs in a beautiful home."
Think about your target buyer. Are you selling a nursery dresser? Add a cute wooden toy and a small stack of baby books. Is it a sleek bar cabinet? Place two crystal glasses and a bottle of sparkling cider on top.
The Secret: The Power of Three.
When staging the top of a piece, use items of varying heights. A tall vase, a medium-sized book, and a small decorative bowl create a visual triangle that is pleasing to the eye.
- Use Greenery: A small plant or a few eucalyptus stems in a vase add "life" to a photo.
- Keep it Real: Don't over-stage. If the top of the dresser is covered in twenty different knick-knacks, it looks cluttered. Stick to 3-5 high-quality props.
- Neutral Props: Use books with the covers removed (showing the neutral spine) or simple ceramic pieces. You want the props to compliment the furniture, not compete with it.

Master the "Boutique" Angles
Most people take one photo of their furniture from a standing position, looking slightly down at the piece. This is the "amateur angle." It makes the furniture look small and insignificant.
To make your flip look like a $500 piece, you need to change your perspective.
The Secret: Get Low.
Squat down so your camera is at the midpoint of the furniture. This makes the piece look grand and structural. Ensure your phone is perfectly vertical: if you tilt it forward or backward, the lines of the furniture will look warped (this is called "keystoning").
The Three Must-Have Shots:
- The Hero Shot: A straight-on, eye-level shot showing the entire piece.
- The 45-Degree Angle: A shot from the corner that shows the front and the side. This gives the piece a 3D feel and shows its depth.
- The Detail Shot: A close-up of the hardware, the wood grain, or a specific design feature. This is where you prove the quality of your work.
Highlight the Details (Close-Ups are Sales Closers)
In a furniture flipping side hustle, trust is everything. Buyers want to see that you didn't just "slap some paint on it." They want to see the smooth finish, the clean edges, and the beautiful hardware.
High-end boutiques always include "macro" shots of textures. This makes the piece feel tactile and high-quality.
The Secret: Use "Portrait Mode" on your smartphone for your detail shots. This slightly blurs the background, making the hardware or the wood grain "pop." It creates a professional, editorial look that screams "custom-made."
Capture shots of:
- Freshly lined drawers (a huge selling point!).
- New or polished original hardware.
- The smoothness of the top surface.
- Any unique architectural details like carved legs or fluted doors.

Edit for Professionalism (Not for Deception)
You don't need Photoshop to get great results. Free apps like Lightroom Mobile or Snapseed are incredibly powerful. However, the goal of editing is to make the photo look like the piece does in real life: just a more polished version.
The Secret: Adjust the "Whites" and "Blacks."
Instead of just cranking up the brightness (which washes out colors), try adjusting the "Whites" to make the photo look crisp and the "Blacks" to give it depth.
- Straighten Your Lines: Use the "Perspective" or "Crop" tool to make sure your vertical lines are perfectly straight. A tilted photo looks messy.
- Correct the White Balance: If the photo looks too blue or too yellow, use the "Warmth" or "Temperature" slider to fix it until the whites look pure white.
- Avoid Heavy Filters: Never use Instagram-style filters. They look dated and dishonest. Buyers will be disappointed if the color of the piece in person doesn't match the "filtered" version online.
Use a Consistent "Brand" Look
If you are planning to do this regularly, consistency is key. When someone clicks on your profile or visits your blog, they should instantly recognize your style.
The Secret: Use the same staging props and the same background for every piece you sell. This creates a "curated shop" feel rather than a random collection of items. It builds brand authority and allows you to charge premium prices because you look like a professional business, not just someone cleaning out their garage.
Ready to Start Your Next Project?
Photography is the bridge between a "DIY project" and a "boutique product." By spending just 30 extra minutes on lighting, staging, and angles, you can significantly increase your profit margins and turn your passion for diy home decor projects into a thriving business.
Don't let your hard work go unnoticed because of a bad photo. Grab your phone, find a window, and start shooting like a pro.
If you’re looking for more inspiration or want to see how we stage our own flips, check out our project gallery. We can’t wait to see what you create!

Quick Checklist for Your Next Shoot:
- Lighting: Morning or afternoon indirect sunlight only.
- Background: Neutral, clutter-free, and clean.
- Staging: "Rule of Three" with greenery and height.
- Angles: Get low and keep those lines straight.
- Details: Portrait mode for hardware and textures.
- Editing: Straighten lines and fix the white balance.
Now get out there and turn that $20 find into a $500 masterpiece!